Looking for a specific thing? Go to our Directory
File Management
You can upload photos to post to your entries in the Manage My Diary section called "File Management". Depending on your user subscription, you get a certain allotted file space to use:
Standard (free): 1MB
BloopPlus: 1 MB +5MB
BloopXtra: 1 MB +25MB
There are two features in File Management: File Manager & Upload File. We will go over both in this entry. Here is what the screen looks like:
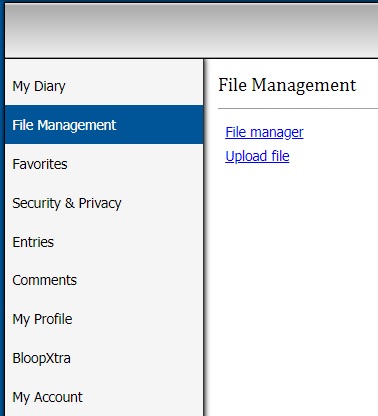
File Manager
This is where your files are listed. As you see below in the graphic, you see your usage summary and then you have the list of all uploaded files, listed alphabetically for you. Each file shows the size of the picture.

As you can see, I have 8 files uploaded. If I click on the name of the file, it brings me to another screen that shows the photo and the URL in the address bar. If you notice on the top left of the box, you have an option box that says "Actions..." with a down arrow. If you click the down arrow you get these two options:

Let's say I no longer need the diary caledar jpg. I want to delete it. I check the box next to the file name, click the down arrow, and choose "delete selected files". You can check as many boxes as you need and delete all at once. If you delete the file and you have that file posted in one of your entries the picture disappears from the entry as a broken image.
You can also upload a file by clicking the second choice in the dropdown menu.
Upload a Photo
The Upload File screen looks like this:
This is a very easy and fast process to undertake! The very top button says "Upload" but you don't want to press that first. Underneath you have a button called "Choose File" and next to it, it says "No file chosen". Click the "Choose File" button and a dialog box appears. Choose your desired file, and click "Open". The name of your file replaces the words next to the "Choose File" button so you know what you have chosen:
Press "Upload" and your file uploads and the screen changes to this:

As you can see, it says "Want to post this image in an entry or message? Just copy & paste the following code:" and gives you the HTML code for images. The File Manager takes care of HTML for you so all you do is highlight the code, copy it, and paste it where you want it! Easy peasy!
Want to upload another file? You don't have to leave to do it. Simply click the button on the top left of the box that says "Upload Another" and it takes you back to the original upload screen.
Fast and easy lesson for you today! Don't forget to visit the directory (link on top of page) for more lessons! Favorite us for future lessons as well!
If you have a query or a problem with your diary, please do not message or comment this diary. Instead, use the 'support' link at the top of the page.
|

 Loading...